
How to Set the Diopter on Binoculars
Written by Outdoors Magazine|
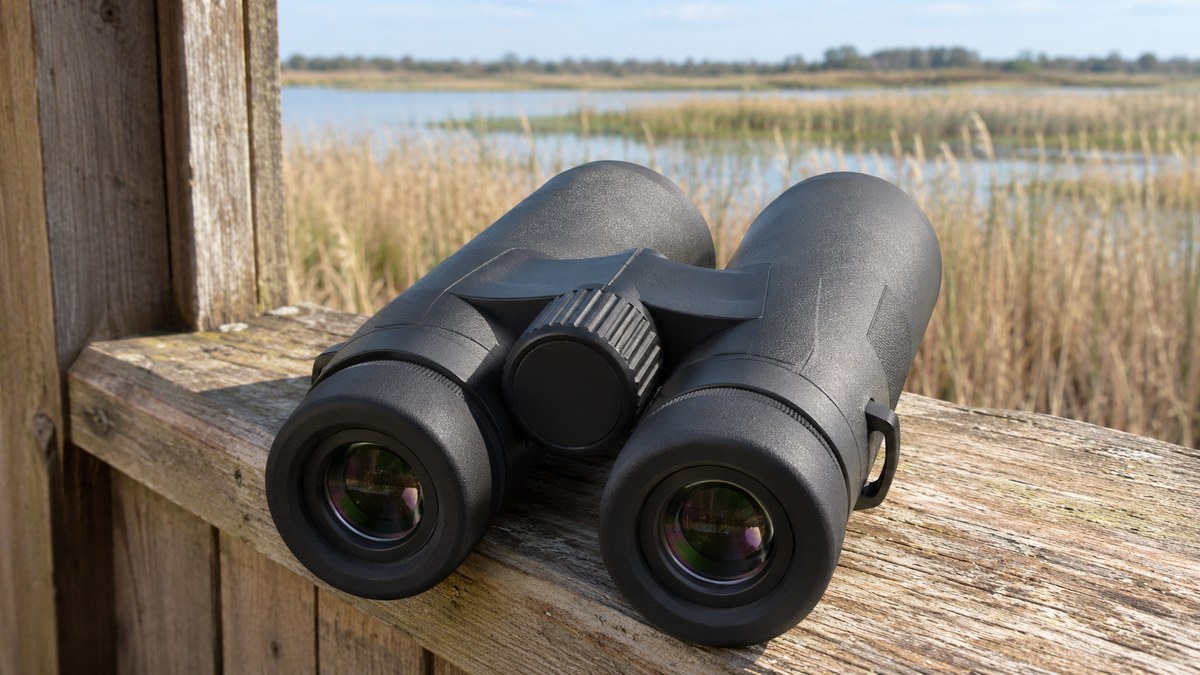
Set the hinge and eyecups first. On most center-focus binoculars with a right-eye diopter, sharpen a stationary target for the left eye with the center wheel, then sharpen the same target for the right eye with the diopter alone. Open both eyes and use only the center wheel to focus at new distances.
Key takeaways
- Fit the hinge and eyecups before touching the diopter.
- On a typical right-diopter pair, use the center wheel for the left eye and the diopter alone for the right eye.
- Use the same stationary detail for both eyes, then change distances with only the center wheel.
Set the hinge and eyecups first. On most center-focus binoculars with a right-eye diopter, sharpen a stationary target for the left eye with the center wheel, then sharpen the same target for the right eye with the diopter alone. Open both eyes and use only the center wheel to focus at new distances.
Hero: Generated editorial photograph for illustration.
What does the binocular diopter actually do?
The diopter compensates for a difference in how your two eyes focus. It is separate from the center wheel, which focuses the binoculars for subjects at different distances. Once both eyes see the same target sharply, leave the diopter alone and use the center wheel when a bird moves closer or farther away.
Think about the order of adjustments, not the numbers printed beside the ring. The hinge moves the eyepieces closer together or farther apart. The eyecups change how far your eyes sit behind the eyepieces. The center wheel brings the scene into focus. The diopter lets one side match the other. Each control fixes a distinct problem, and sweeping all four at once makes it hard to tell what worked.
A mark like zero is a useful place to start if the manual recommends it, but it is not a target you should force yourself to reach. Your usable setting depends on how you look through that particular pair and whether you are wearing your normal vision correction. A diopter marking is not a prescription. If you wear glasses or contacts outdoors, do the setup with the correction you will actually use.
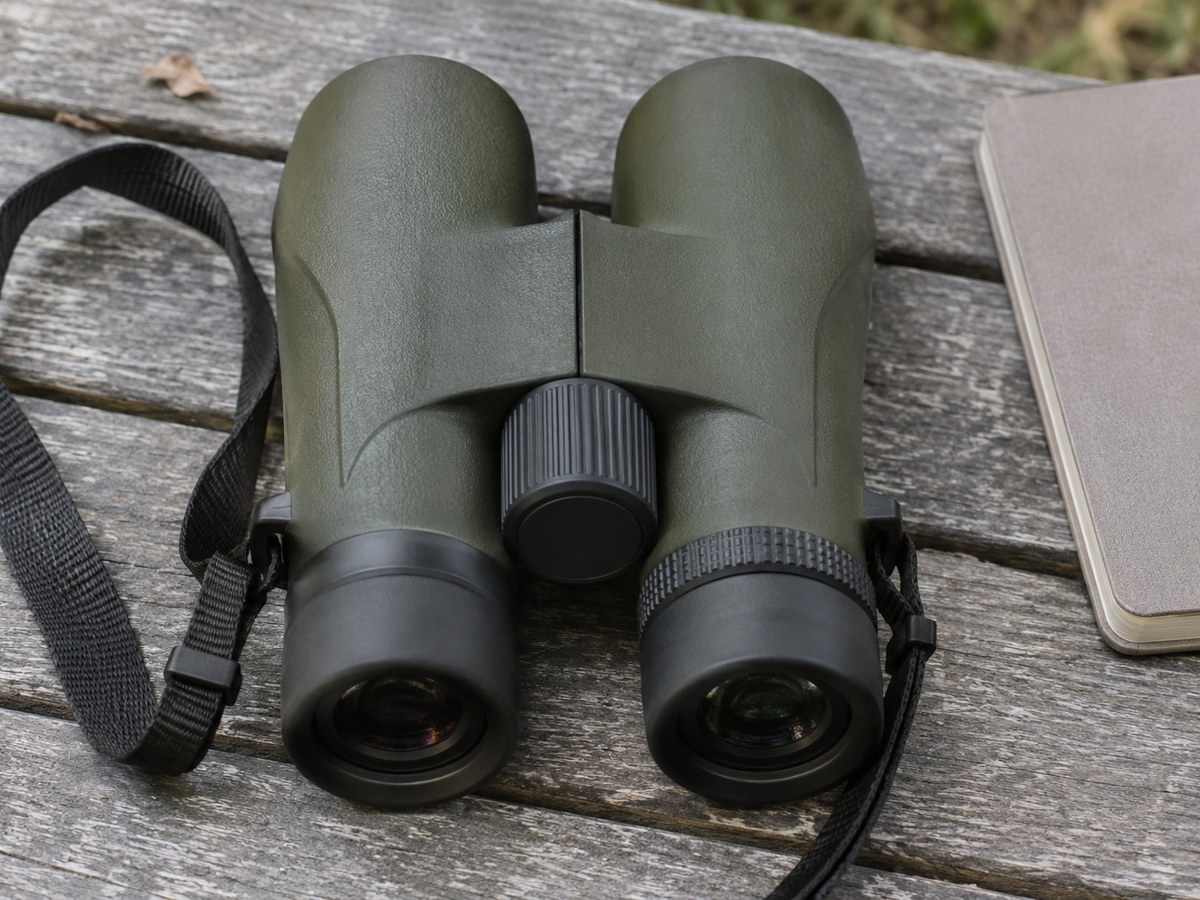
Also check that the textured ring you have found really is the diopter. On a simple pair it may sit just below the right eyecup. Some models use a left-side adjustment or a separate setting built into the center control, and some lock to prevent accidental changes. The model’s own diagram takes precedence over the general steps below.
How should the hinge and eyecups fit before you focus?
Move the hinge until both eyes see one round viewing window, then adjust the eyecups until you can see that window comfortably without dark patches. Glasses usually put your eyes farther from the eyepieces, so start with the eyecups down. Without glasses, start with the cups extended and adjust from there.
This is easier if you start with a distant scene that has detail across the whole field, such as the side of a shed framed by brush and sky. Hold the binoculars at the angle you will actually use, look straight through, and move the barrels slowly. The goal is a single circle, not the overlapping “figure eight” often seen in movies. Don’t squeeze the barrels together to bring a partially focused target into view; set the width for your eyes first.
Some eyecups have intermediate stops. If the default position shows a stable circle but you lose the edges when you shift slightly, test the next position. If the image develops a wandering dark crescent when you get very close, move your eyes back a little or extend the cups one step. If both edges seem clipped with glasses on, check that the cups are fully retracted and the binoculars are centered on your eyes.
Keep your usual glasses on if they give you the best view. Don’t press the eyecups hard against the lenses, and don’t try to use the diopter to clear a dark edge. After you find a comfortable setting, lower and raise the binoculars several times. The same circle should come back without fuss. A pair that never gives you a repeatable full field may simply not fit your face or glasses well.
How do you set a right-eye diopter step by step?
Choose one well-lit stationary target, fit the binoculars, and identify the center wheel and diopter. With the right side covered, focus the left side using the center wheel. Then cover the left side and focus the right using only the diopter. Uncover both sides to check the result and lock the setting if applicable.
- Choose one specific edge or bit of texture on a distant stationary object. A weathered fence latch or a seam on a shaded building is better than a bird that may move. Select a target well beyond the model’s minimum focusing distance; you are checking matching focus, not the closest object it can show.
- Rest your elbows on a stable rail or table if one is available. Bring the binoculars to your eyes with the hinge and eyecups already set. Avoid the sun and do not point binoculars toward it.
- Block the right front lens with its cap or lightly shade it without touching the glass. Look through the left eyepiece and move the center focus slowly through the point of best sharpness, then back to the clearest point. Keep your face relaxed; a hard squint can make results difficult to repeat.
- Block the left front lens instead. Keep looking at the exact same edge and leave the center wheel where it is. Rotate the right-eye diopter in small increments until the detail looks sharp through the right eyepiece. Do not force a control at the end of its travel.
- Uncover both objectives. Look at the target normally. If you have a locking diopter, return the lock to the position shown in the manual. Then use the center wheel on a different target to confirm you can move between distances without resetting the ring.
Avoid testing the left side on the foreground branch and the right side on the wall behind it. They may seem lined up, but the difference in distance can lead you to save the wrong offset. If one eye looks sharp immediately and the other starts to fade after you swap caps, reset the setup calmly from the first side rather than chasing the second side with both controls. Taking a brief pause between repeat runs helps you compare the views without prolonged squinting.
What if your binocular has no right-side diopter ring?
Check the manual before turning an unfamiliar control. A left-eye diopter generally means you use the center focus for the other eye first. If each eyepiece has its own focus and there is no shared focusing wheel, set both eyes separately and repeat that focusing process as the subject distance changes.
A locking control is worth identifying before you go outdoors. Some designs pull up or out to adjust, then push down or in when finished; others use a different release. Use the method shown for your binocular instead of forcing a ring because it looks like one in a photo. A focus control near the hinge may serve different purposes depending on whether it is in its normal or adjustment position.
There are also binoculars with no user-adjustable offset. In that case, use the available fit and focus controls and check whether the result is comfortable with your normal correction. Do not try to remove or loosen a collar to create an adjustment. The manual also tells you whether the two barrels can be focused separately, which matters if you move often between near and distant objects.
The goal is the same even when the controls change: each eye must see the same detail at the same distance in focus. The rule about leaving the diopter alone afterward applies to center-focus designs with a separate compensation setting. It does not turn a two-eyepiece focusing system into one with a shared wheel.
Why is the view still blurry, clipped, or doubled?
Match the symptom to the adjustment instead of turning every control. Dark crescents or a clipped edge usually point to eye placement, while a clean round field with one soft side calls for a focus check. A persistent double image after correct fitting and careful rechecking may need inspection, not more diopter.
First separate blur from shake. Settle your elbows on a rail, use a fixed target and ask whether a thin line is consistently soft or briefly sharp before moving again. If the line moves in and out of your view with your hands, it is not a reliable way to choose a ring position. Try a nearby shaded post instead of a far target above hot asphalt; shimmering air can hide detail even through clean, properly adjusted optics.
A dark crescent that shifts when you roll the binoculars or move your head is useful evidence. Recheck how the eyecups position your eyes and whether the hinge allows a repeatable circle. If both sides are clear separately but the combined image shows two distinct copies of the same target, repeat the fit check at a normal distance with a relaxed gaze. Do not try to align the internal optics yourself. A continuing double image, especially after a drop, is a reason to check the manufacturer’s service guidance.
Look through both sides separately if one seems consistently hazy. Check for fog or smudges on the exterior and follow the manufacturer’s cleaning directions for the particular coatings. Look at the same ordinary target with and without the binoculars using your usual correction. If a change seems to follow one eye and also appears without the binoculars, do not assume the optics caused it; seek appropriate eye care for persistent visual changes.
Lastly, distinguish the center from the far edge of the image. Judge the diopter with the target centered, not by moving it to a corner and trying to sharpen the entire view. Check the manual before concluding that a center focus ring which reaches a stop on a very close target is weak or broken. A target inside the binocular’s focusing range is the fair test.
How do you keep the adjustment repeatable in the field?
Check the diopter before an outing if someone else used the binoculars, you changed glasses, or the ring may have shifted in your bag. Note your personal setting and eyecup position, then do a quick same-target check. During the outing, use the center wheel for distance changes unless the binocular uses separate eyepiece focus.
A simple routine helps when an observation window is brief. Pick the bird or landmark with your unaided eyes. Without looking away, raise the binoculars until the fitted circle appears. Bring the target into focus with the center wheel before you try to inspect plumage or follow movement. If the bird flies off, put the binoculars down and re-find it with your eyes rather than scanning an unfamiliar field while adjusting every control.
When sharing binoculars, tell the second person which controls they can change and how to identify the other setting. A photograph of your ring mark and eyecup positions can be a practical starting point for restoring them later. If the ring has no useful markings, recheck instead of adding anything that could interfere with a seal or locking control. Neither a stored mark nor a photo replaces a two-eye check when the view feels different.
Once a bird is centered and sharp, notice the feature you can describe reliably: bill shape, a contrasting wing patch, or its movement through the habitat. Do not fill in markings you could not see clearly. For recording those observations, continue with our beginner birding checklist for field notes.
Practice that sequence before the first interesting sighting. Choose a textured subject at one distance and an obvious landmark farther away. Alternate between them several times without touching the diopter. Then lower the binoculars, find the nearer subject by eye, and repeat. The objective is not speed on the first try. It is knowing by feel which knob your finger is on, so you keep the fit and offset you have already set.
If you mainly use binoculars on a walk, give yourself a repeatable stop-and-look position rather than trying to focus while moving. Pause away from the trail edge, plant your feet, and bring your elbows closer to your body if you have no rail. A short stable look can tell you more than a long moving scan. Afterward, return the lens covers and stow the binoculars where the focus and eyecup controls will not take the full pressure of the pack.
Manufacturer instructions:
Frequently asked questions
What does the binocular diopter actually do?
The diopter compensates for a difference in how your two eyes focus. It is separate from the center wheel, which focuses the binoculars for subjects at different distances. Once both eyes see the same target sharply, leave the diopter alone and use the center wheel when a bird moves closer or farther away.
How should the hinge and eyecups fit before you focus?
Move the hinge until both eyes see one round viewing window, then adjust the eyecups until you can see that window comfortably without dark patches. Glasses usually put your eyes farther from the eyepieces, so start with the eyecups down. Without glasses, start with the cups extended and adjust from there.
How do you set a right-eye diopter step by step?
Choose one well-lit stationary target, fit the binoculars, and identify the center wheel and diopter. With the right side covered, focus the left side using the center wheel. Then cover the left side and focus the right using only the diopter. Uncover both sides to check the result and lock the setting if applicable.
What if your binocular has no right-side diopter ring?
Check the manual before turning an unfamiliar control. A left-eye diopter generally means you use the center focus for the other eye first. If each eyepiece has its own focus and there is no shared focusing wheel, set both eyes separately and repeat that focusing process as the subject distance changes.
Why is the view still blurry, clipped, or doubled?
Match the symptom to the adjustment instead of turning every control. Dark crescents or a clipped edge usually point to eye placement, while a clean round field with one soft side calls for a focus check. A persistent double image after correct fitting and careful rechecking may need inspection, not more diopter.
How do you keep the adjustment repeatable in the field?
Check the diopter before an outing if someone else used the binoculars, you changed glasses, or the ring may have shifted in your bag. Note your personal setting and eyecup position, then do a quick same-target check. During the outing, use the center wheel for distance changes unless the binocular uses separate eyepiece focus.