
How to Keep Gear Dry With a Backpack Liner
Written by Outdoors Magazine|
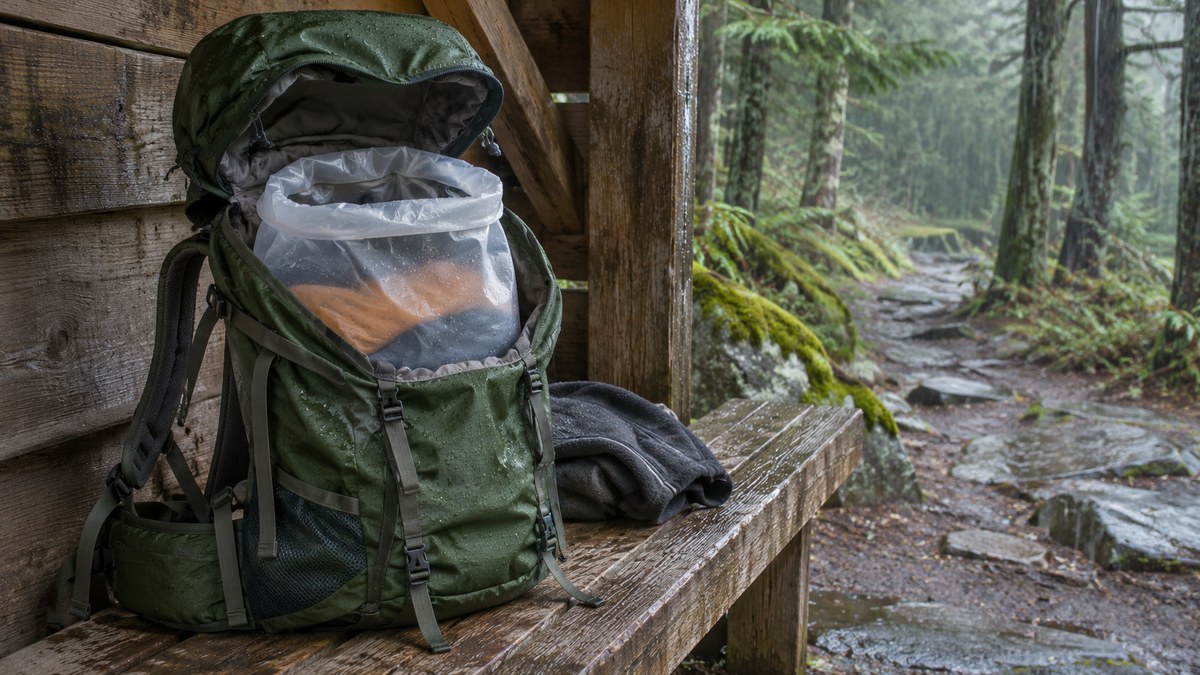
Put a sturdy pack liner inside your backpack and seal dry clothes and your sleeping bag inside it. Keep your rain shell, wet tent fly, and anything that might leak outside that dry compartment. If soaked insulation would put the trip at risk, give your sleeping bag its own closed dry sack inside the liner.
Key takeaways
- Use a durable liner that reaches the pack’s corners and leaves enough material to close.
- Keep wet gear and likely leaks outside the sealed liner.
- Give sleeping insulation its own dry sack when a wet bag would put the trip at risk.
Put a sturdy pack liner inside your backpack and seal dry clothes and your sleeping bag inside it. Keep your rain shell, wet tent fly, and anything that might leak outside that dry compartment. If soaked insulation would put the trip at risk, give your sleeping bag its own closed dry sack inside the liner.
Hero: Generated editorial photograph for illustration.
Rain gets into more than just the top of a pack. It can work through openings at the back, run down a wet sleeve as you reach inside, or come from the tent fly you packed that morning. A liner puts a barrier around what needs to stay dry, even when the pack itself gets wet. The National Park Service’s Alaska gear advice recommends bagging spare clothing and the sleeping bag inside even if the pack has a rain cover. Here is how to make that setup work from the first shower through the next morning.
What is a backpack liner, and how is it different from a cover?
A backpack liner is a bag that goes inside the main compartment and closes around the gear you want dry. A rain cover goes around the outside and sheds some water off the pack fabric. A cover can be useful, but it does not replace an internal barrier around your insulation.
Think of the cover and liner as doing different jobs. The cover helps shield the outside, including some compartments and much of the fabric. It may leave the back panel and harness exposed, and you have to move it to get into some pockets. The liner does nothing for an outside pocket, but it keeps the dry gear in one place after the shell or back panel gets wet. If you take both, use the outer cover when it is useful and keep the inner closure set up the same way whether you use the cover or not.
A separate dry sack does a third job. It gives one item its own closure and makes it easier to retrieve that item without exposing everything else. You could protect each piece with individual bags instead of using one liner, but check that the whole set of essentials really is accounted for. The single-liner approach makes the boundary obvious: dry gear goes inside, wet or leaky gear stays outside.
None of these is a reason to wade through floodwater or put the pack down where it can sit underwater. The National Weather Service’s flood safety guidance says not to walk into flooded areas. When a crossing or trail section is flooded, turn around rather than testing your gear or your footing.
What kind of liner should you use?
Choose a durable bag that reaches the bottom of the pack and still leaves enough material above your gear to close it. An unscented heavy plastic bag or a purpose-made pack liner can work for rain. Avoid fragile bags, and follow the closure instructions for a liner with a built-in roll top.
Test the fit with your actual load rather than relying only on the pack’s capacity. A bag can have enough volume on paper and still be too narrow to reach into the lower corners or too short to close with your sleep gear inside. Open it in the empty pack, spread it into the base, and check whether the neck is still workable once your normal load is in. If the plastic stretches tight around seams or objects, choose a roomier bag or smooth the load before using it.
Look for holes, worn folds, and stretched spots in bright light before a trip, especially where the pack bends or a stove or buckle rested. Retire a liner from critical duty if it has a tear you cannot reliably close. A spare liner or a separate dry sack gives you an option if you discover damage away from home. A hard cookware edge, a tool, or a stack of tent stakes belongs outside the liner or in a protective sleeve that cannot poke it. Avoid putting fragranced bags into your system where that could complicate the local rules for items with odors.
Shop for the closure as much as for the fabric. A simple bag you can twist and fold with cold hands may be easier for you than a narrow closure on a busy break. Try the motions with gloves at home. If the bag is sold as waterproof, check what the label actually promises. Waterproof material and a secure rain closure are not the same as a product rated for submersion.
How do you load and close a backpack liner?
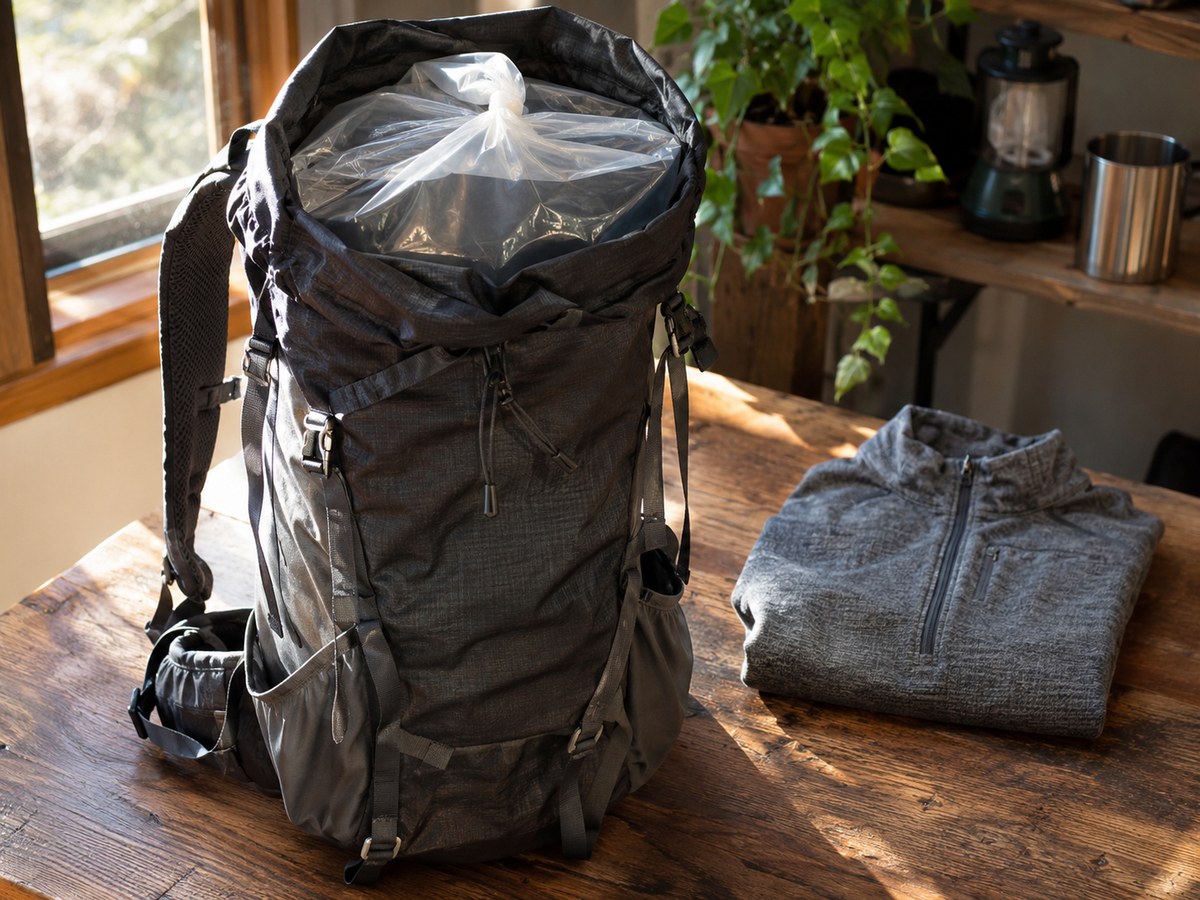
Set the liner into the empty main compartment and press it gently into the corners. Put the sleeping bag and dry clothes inside, release excess air without straining the material, then close it above the load. With a plain liner, twist the excess neck, fold it back, and secure it so it cannot unwind.
Start with the sleep gear you expect to use only at camp. A sleeping bag can go low in the liner, with a set of sleeping clothes and dry socks above it. If you use a separate sleeping-bag sack, close that sack before putting it into the liner. Do not tighten the rest of the pack against an overfilled liner. If you cannot gather enough neck to close it comfortably, move something out or use a better-fitting liner. It is easier to redo this on the living room floor than in cold rain.
Give the closure a place to sit. After twisting and folding a plain liner, tuck the secured fold above the dry gear, away from the main zipper’s path and clear of sharp buckles. For a dedicated roll-top, follow its instructions and brush sand or debris off the sealing surface. The goal is not to pull the neck so tight that the material stretches. It is to keep the opening folded and closed while the pack shifts around on your back.
Load one item at a time and check the layers from the top. A sealed liner should be obvious when you open the backpack. If you see a spare shirt draped across it or a wet sleeve disappearing through the opening, correct the packing now. Near the top, reserve a reachable place for a spare layer in its own small bag if you expect to stop on cold ground or at a windy pass. That way a clothing change doesn’t require opening the sleep compartment.
Which gear should stay outside the liner?
Keep wet items and possible leaks outside the dry compartment: rainwear in use, a wet tent fly, water bottles and a hydration bladder. Keep the rain shell where you can reach it without unpacking. Follow local food-storage rules, and give your navigation, communication and lighting gear protection you can access quickly.
Use mesh or exterior pockets for wet items only if they hold the items securely. If exterior space is tight, a wet fly can go in a separate sack above or beside the sealed liner. Use a dedicated spot you can recognize without digging. A wet fly in a sack may still drip, so it should not ride above an open closure or next to loose sleeping clothes. Keep hard hardware and loose stakes separate from both the sleep insulation and the liner material.
A hydration bladder can leak from the hose, valve, or closure even if the sky is clear. Keep it out of the lined compartment and close the tube valve before setting the pack down. Check the pack’s bladder sleeve to see whether a leak could run behind the liner. For a pack with no separate sleeve, a secured side bottle may be simpler for this setup. Whatever you use, keep water available while moving so there is no reason to undo the dry compartment at every stop.
The essentials you need quickly should stay reachable, not at the bottom with the sleeping bag. The NPS hiking safety checklist is a useful starting point for navigation, layers, lighting, and emergency gear. Give a map, phone or communicator, and headlamp their own weather protection appropriate for the item, while keeping them in familiar pockets. For food, trash, and scented items, follow the local land manager’s rules; a liner or dry sack does not substitute for an approved bear-resistant container.
When should your sleeping bag have its own dry sack?
Use a separate dry sack inside the liner when keeping your sleeping bag dry is especially important, such as on a cold or remote overnight trip. It adds a second barrier if the outer liner gets punctured or opened in rain. Close both layers independently, and don’t assume either can go underwater.
There is a meaningful difference between a little drizzle on a short loop back to the car and wet weather where you are relying on your sleep system miles from a road. The NPS Denali gear guidance explains why wet down is a concern: it can lose insulating ability. That does not make a damp synthetic bag a sound backup plan. Treat all sleeping insulation as dry gear and choose insulation and a pad appropriate for the trip, not just for fitting into the pack.
On a day hike with no sleeping bag, use the same liner for the spare dry layers you’re taking, and bag the accessible warm layer separately when it matters. On a long wet trip, protect at least one set of sleeping clothes from both rain and damp gear you have been wearing. You do not need to unpack it at every rest stop. If you have to use those clothes to get warm earlier than planned, reassess what’s left for the overnight instead of continuing as if the reserve still exists.
Keep the inner dry sack closed through the most exposed moments: pulling a tarp out, organizing a wet vestibule, or shifting gear to the tent. Do not store a sleeping bag for weeks in its tight travel sack. At home, follow its care instructions and let the bag dry completely before storing it loosely.
How do you keep the system working at breaks and in camp?
Get under cover before opening the dry compartment, and take out only what you need. Set the pack on a stable surface away from pooling water, wipe droplets off your hands and the liner neck, and close the liner again. In camp, unpack your sleep gear after you have a dry place for it.
In light rain, the place you stop matters. Put the opening away from the rain if you can, and keep your wet jacket sleeve or the edge of the pack lid from brushing exposed clothing. A pre-bagged layer should be easy to pull out and put back. If you need to stop in heavy rain and cannot reach cover, do what keeps you safe; take what you need, close the liner as soon as you can, and check the contents when you reach shelter.
A sensible camp order is shelter first, dry floor or sleeping pad next, then sleeping bag and clothes. Keep the wet fly away from the sleep kit and check for splash, floor moisture, and condensation before setting gear down. A liner protects only while the gear is inside it. In the morning, pack the dry sleeping bag and clothes first, close the liner, then handle the outer fly and any wet groundsheet. Give gear time to air out when conditions allow rather than leaving everything sealed indefinitely.
If the liner tears, move the most important dry items into an intact spare liner or dry sack. If gear is damp, keep it separate from what is still dry. Change plans if you cannot stay warm overnight. The CDC’s hypothermia guidance notes that rain, sweat, and cold water can chill people enough to become dangerous. Confusion, fumbling, slurred speech, or unusual drowsiness in a chilled hiker should not be dismissed. Seek immediate medical help for signs of hypothermia, and get out of the cold and wet if you can do so safely.
Before leaving home, load the pack once, close the liner, and practice getting your rain shell and one warm layer out without touching the sleep gear. Then practice putting a damp garment away without reopening the liner. If those two tasks are simple, you have a packing system you can actually use in rain. For the rest of the gear that’s already wet, see our guide to drying wet hiking boots.
Frequently asked questions
What is a backpack liner, and how is it different from a cover?
A backpack liner is a bag that goes inside the main compartment and closes around the gear you want dry. A rain cover goes around the outside and sheds some water off the pack fabric. A cover can be useful, but it does not replace an internal barrier around your insulation.
What kind of liner should you use?
Choose a durable bag that reaches the bottom of the pack and still leaves enough material above your gear to close it. An unscented heavy plastic bag or a purpose-made pack liner can work for rain. Avoid fragile bags, and follow the closure instructions for a liner with a built-in roll top.
How do you load and close a backpack liner?
Set the liner into the empty main compartment and press it gently into the corners. Put the sleeping bag and dry clothes inside, release excess air without straining the material, then close it above the load. With a plain liner, twist the excess neck, fold it back, and secure it so it cannot unwind.
Which gear should stay outside the liner?
Keep wet items and possible leaks outside the dry compartment: rainwear in use, a wet tent fly, water bottles and a hydration bladder. Keep the rain shell where you can reach it without unpacking. Follow local food-storage rules, and give your navigation, communication and lighting gear protection you can access quickly.
When should your sleeping bag have its own dry sack?
Use a separate dry sack inside the liner when keeping your sleeping bag dry is especially important, such as on a cold or remote overnight trip. It adds a second barrier if the outer liner gets punctured or opened in rain. Close both layers independently, and don’t assume either can go underwater.
How do you keep the system working at breaks and in camp?
Get under cover before opening the dry compartment, and take out only what you need. Set the pack on a stable surface away from pooling water, wipe droplets off your hands and the liner neck, and close the liner again. In camp, unpack your sleep gear after you have a dry place for it.