
How to Dry Wet Hiking Boots Without Direct Heat
Written by Outdoors Magazine|
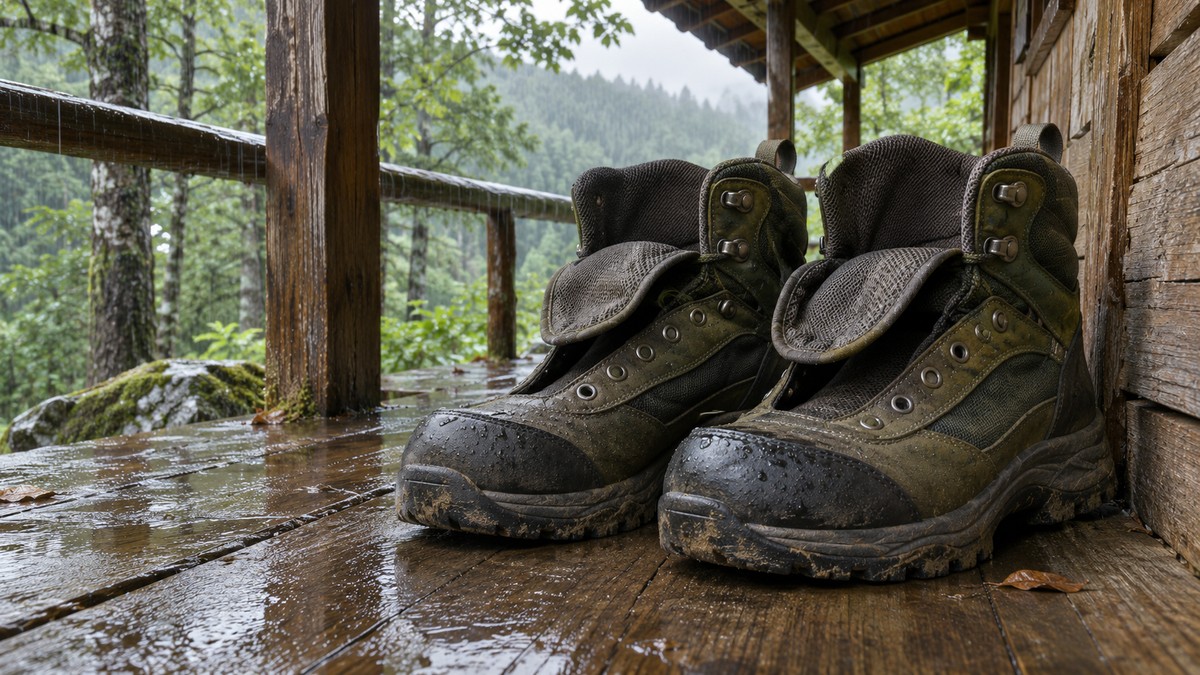
Remove the footbeds if they are removable, open the boots wide, and air-dry the parts separately at a moderate temperature away from direct heat.
Key takeaways
- Open wet footwear and remove an insole only if it is designed to come out.
- Dry at a moderate temperature with ventilation and no direct heat.
- Check the lining, toe, and footbed separately before reassembly.
- Have a suitable alternative if a demanding hike cannot wait.
Open wet hiking boots wide, remove the insoles if they are designed to come out, and dry the parts separately at a moderate temperature with good airflow. Keep them away from direct heat. If the lining or footbed is wet before the next demanding hike, use a suitable dry pair or change the plan.
What should you do first when hiking boots get soaked?
Get the boots out of their bag, loosen the laces, open the tongues, and pour out standing water. Lift out removable footbeds and knock out loose gravel. Set the pieces apart in a well-ventilated place, then follow the model's cleaning directions if mud or other residue still needs to come off.
Start by working out what is actually wet. A dark patch on the outside may be the upper holding water, while a wet sock, slosh, or soaked footbed tells you the inside also needs attention. Your response can be simple for rain on the exterior and more deliberate after the boots have filled at the collar. Drying the outside alone will not help much if a wet footbed stays pressed against the inside of the boot.
Unlace far enough that the tongue is not pulled against the lining. If you expect to clean mud behind the tongue, removing the laces entirely makes access easier. Lift a removable insole from its usual removal point rather than yanking a bonded one. Turn the boot just long enough to drain loose water without crushing it, and check the toe for gravel. A soft cloth can pick up excess moisture where you can reach it without scraping fabric.
Brush off loose, dry dirt first when practical. Whether to rinse the upper or wipe it with a damp cloth depends on the shoe's materials and manufacturer. The LOWA boot-care guide describes opening leather boots and removing the insoles and laces. The GORE-TEX footwear guidance likewise describes taking out removable insoles and avoiding direct heat, but tells readers to follow the footwear maker's instructions too.
Where can you dry wet boots without direct heat?
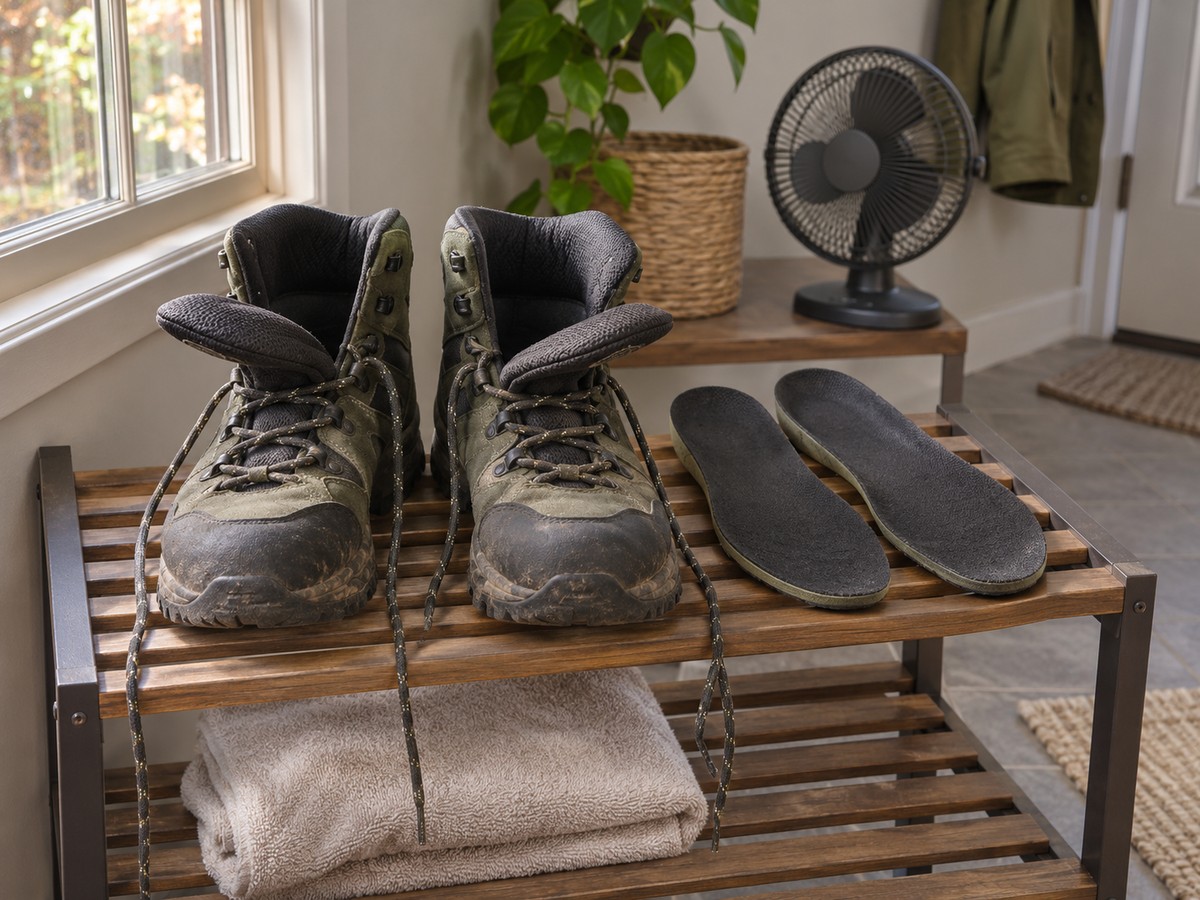
Choose a dry, ventilated spot at a moderate temperature, with the boot openings exposed and the insoles laid separately. Make space around each boot instead of tucking the pair against a wall or into a bag. A sheltered porch can work if the air is dry enough and rain will not reach them.
At home, a boot tray in a ventilated room protects the floor without surrounding the boots in absorbent material. Position the pair so each opening has clear space. Rest removable insoles on a rack or where air can move around them, not pressed underneath the boots. Put the laces somewhere they can dry without tangling around another wet garment. If there is standing water in the tray, empty it so drips do not undo the work.
On a trip, use the driest available sheltered spot that is permitted and secure. Outdoors, choose cover from rain or overnight dew rather than a spot directly under the dripping edge of a roof. Inside, skip the crowded corner beside a pile of wet clothing. A bathroom after several hot showers can be a poor drying space: it may have the advantage of a waterproof floor but not the airflow or dry air you need. Follow lodging rules and avoid blocking walkways or doorways.
Some makers describe using paper to wick moisture. Meindl's care instructions suggest newspaper for a wet lining and specify taking it back out after a few hours. Treat it as a temporary wick, not as a plug you leave overnight and forget. If the manufacturer allows it, use a little loosely placed absorbent paper, check it, and remove or change it when damp. Leave the openings exposed for the rest of the drying time.
Why should you avoid fires, radiators, and hot cars?
Direct heat can be hard to control and is not a substitute for ventilation. LOWA warns that it can shrink or crack leather, while GORE-TEX recommends natural drying at moderate temperatures. Keep wet footwear away from fires, heaters, and hot enclosed vehicles, and do not count on a fixed overnight drying time.
The outside is not a reliable proxy for the inside. A boot set near an intense heat source may feel dry at the toe cap while the inner footbed is still wet. If you rotate it closer or leave it unattended, there is no predictable way to keep all the materials in their intended conditions. Different parts of a modern boot may include textiles, leather, foam, glue, and components whose care requirements are not obvious from the outside.
The same reasoning rules out a tumble dryer or oven unless the footwear maker specifically approves a method, which is not part of this general routine. LOWA explicitly advises against drying boots in an oven, near heaters, or in a hot car; Meindl warns against hot surfaces and direct sun. Do not substitute a hair dryer aimed into the toe. If you need to leave soon, change footwear, shorten the outing, or wait for better conditions rather than turning an improvised heat source into a deadline.
There is a meaningful distinction between a purpose-built dryer and a heater directed at a boot. GORE-TEX lists convection-style boot dryers as an option for its footwear. Compatibility still depends on the instructions for both the dryer and your footwear. When you cannot check both, use the open-air method. This guide draws on published care directions and does not rate drying appliances or report a speed test.
Does leather, synthetic mesh, or a membrane change the routine?
The start is similar: open the boot, remove a removable insole, and provide airflow without direct heat. Materials change what washing and aftercare products are appropriate, and different constructions will not dry at the same rate. Check the instructions for the actual boot before adding detergent, water repellent, or leather conditioner.
With leather, identify the finish as best you can before applying any cleaner or treatment. Smooth leather, nubuck, and suede are not interchangeable from a product-care perspective. Begin with the manufacturer's routine rather than borrowing a maintenance product designed for another pair. If a finish changes color or texture after treatment, it may not return to the original look; the brand's guidance is a better basis than assuming any neutral product is invisible.
With synthetic mesh, exposed fabric does not mean every part is already dry. Check padded areas at the heel, the underside of the tongue, and the deepest reachable part of the toe box. A mixed-material shoe may have a lining that stays damp after its broad outside panels look ready. Keeping the opening clear is useful regardless of the style of upper.
If a waterproof-lined pair got wet inside, consider the route the water could have taken. Water can enter through a collar, and sweat also makes a boot feel damp. One wet outing does not diagnose a failed membrane. GORE-TEX's instructions distinguish restoring water repellency on the outside from drying and cleaning, and recommend using compatible products. If repeated wetting occurs under comparable conditions despite regular care, ask the boot maker about inspection or repair rather than applying more treatment in hopes of sealing everything.
How can you tell whether the boots are ready tomorrow?
Check the toe box, heel padding, underside of the footbed, and tongue separately. A dry upper is not enough if the inside still transfers moisture to a clean cloth. Reassemble only after the components are dry enough for the conditions ahead. Pack a dry footwear option when a wet start would be a problem.
Make the check before putting on your hiking socks. Touch the heel lining and the back of the insole and compare each with a dry part of the boot. For a harder-to-reach toe, use a small clean dry cloth, remove it promptly, and inspect it for transferred moisture. This is a practical inspection, not a measurement and not a prediction that the shoes will remain dry. If the insole is still damp, let it dry separately while you make the rest of the day's plan.
Consider the conditions rather than asking for a single rule for slightly damp footwear. A short low-consequence trail close to your car is not the same as a cold, remote day with a long return and little opportunity to stop. If your backup shoe would be inappropriate for the terrain, do not count it as a replacement just because it is dry. Choose a suitable pair, an easier plan with an established exit, or a later start instead. Dry spare socks are useful, but they do not make a soaked lining dry.
Use this moment to check for a bunched insole, grit, damaged eyelets, or a developing separation around the sole. Replacing a lacing or fit issue with a drying trick will not solve it. Our guide to preventing hiking blisters addresses fit and friction separately, and the hiking essentials guide covers the broader spare-layer and packing decisions.
How do you make the routine work on a multiday trip?
Start drying at the first practical sheltered stop instead of leaving the boots packed until bedtime. Keep dry socks and clean gear separate from wet footwear, and repeat the footbed check each morning. Plan for the possibility that the boots will not dry overnight, especially when the air is damp or cold.
For a weekend based at a cabin or car, assign a footwear spot before the first wet hike. Set aside a tray or a clean old towel for drips, dry socks that stay inside a separate bag, and an alternative pair if appropriate for the route. At the end of the day, dry the wet gear first instead of stacking it while you cook or change. A predictable sequence is more useful than a new gadget discovered at the last minute.
For a moving trip, accept that the same drying time is not available each night. Use safe, permitted, ventilated places during stops; protect the pair from fresh rain; and keep clean items dry in the pack. Do not leave loose insoles where they can blow away. Note whether the boots are getting progressively wetter, and adjust the next day's mileage or route early instead of assuming they will feel the same on the second morning as the first.
Once home, finish drying the boots before storing them. Keep the deeply wet pair out of the gear bin, remove lingering dirt using the maker's directions, and allow the footbeds to finish separately. If the sole lifts, there is visible cracking, or a lining is persistently damaged, ask the maker or a qualified repair shop whether repair makes sense. Drying is only one part of maintaining a boot that fits and works.
What should you check before putting cleaned boots away?
Make sure the footbeds, lining, and laces are dry and the outsole grooves are clear before you store the pair. Put the insoles back flat, with no curled edge. If the manufacturer recommends an outer treatment, follow its instructions for material compatibility, application timing, and any subsequent drying needed.
Check under the footbed last. This is an easy spot to miss after the laces have dried and the upper looks normal. If the maker says a waterproofing treatment belongs on a slightly damp exterior, that does not mean the interior should stay wet in storage. Follow the sequence for that particular product without treating it as a universal instruction for all footwear. When the work is finished, use a dry, ventilated storage area away from intense heat.
Frequently asked questions
Can you dry wet hiking boots by a campfire?
Avoid direct heat from a campfire, radiator, or other heater. That heat is difficult to control, and footwear makers warn it can harm some materials. Open the footwear and remove removable insoles, then use a separate, ventilated place at a moderate temperature.
Should you stuff wet hiking boots with newspaper?
Some boot makers describe using newspaper temporarily to absorb moisture from the lining. Follow your model’s care directions. If you use it, place it loosely, check it after a short period, and remove or change it when damp so it does not block airflow.
How long will soaked hiking boots take to dry?
There is no single reliable time. It depends on the boot’s construction, how much water remains, and the drying space. Check the toe, heel lining, and back of the insole in addition to the upper before deciding whether the boots are ready.
Does reproofing dry out a waterproof-lined boot?
No. A compatible water-repellent treatment addresses the outer surface, not the moisture already in the lining. Start with the manufacturer’s instructions for cleaning and drying your model, then apply a compatible treatment only when appropriate. Repeated wetting may warrant a conversation with the footwear maker.