
How to Pack a Gravel Bike for Two-Day Dirt
Written by John Wren|
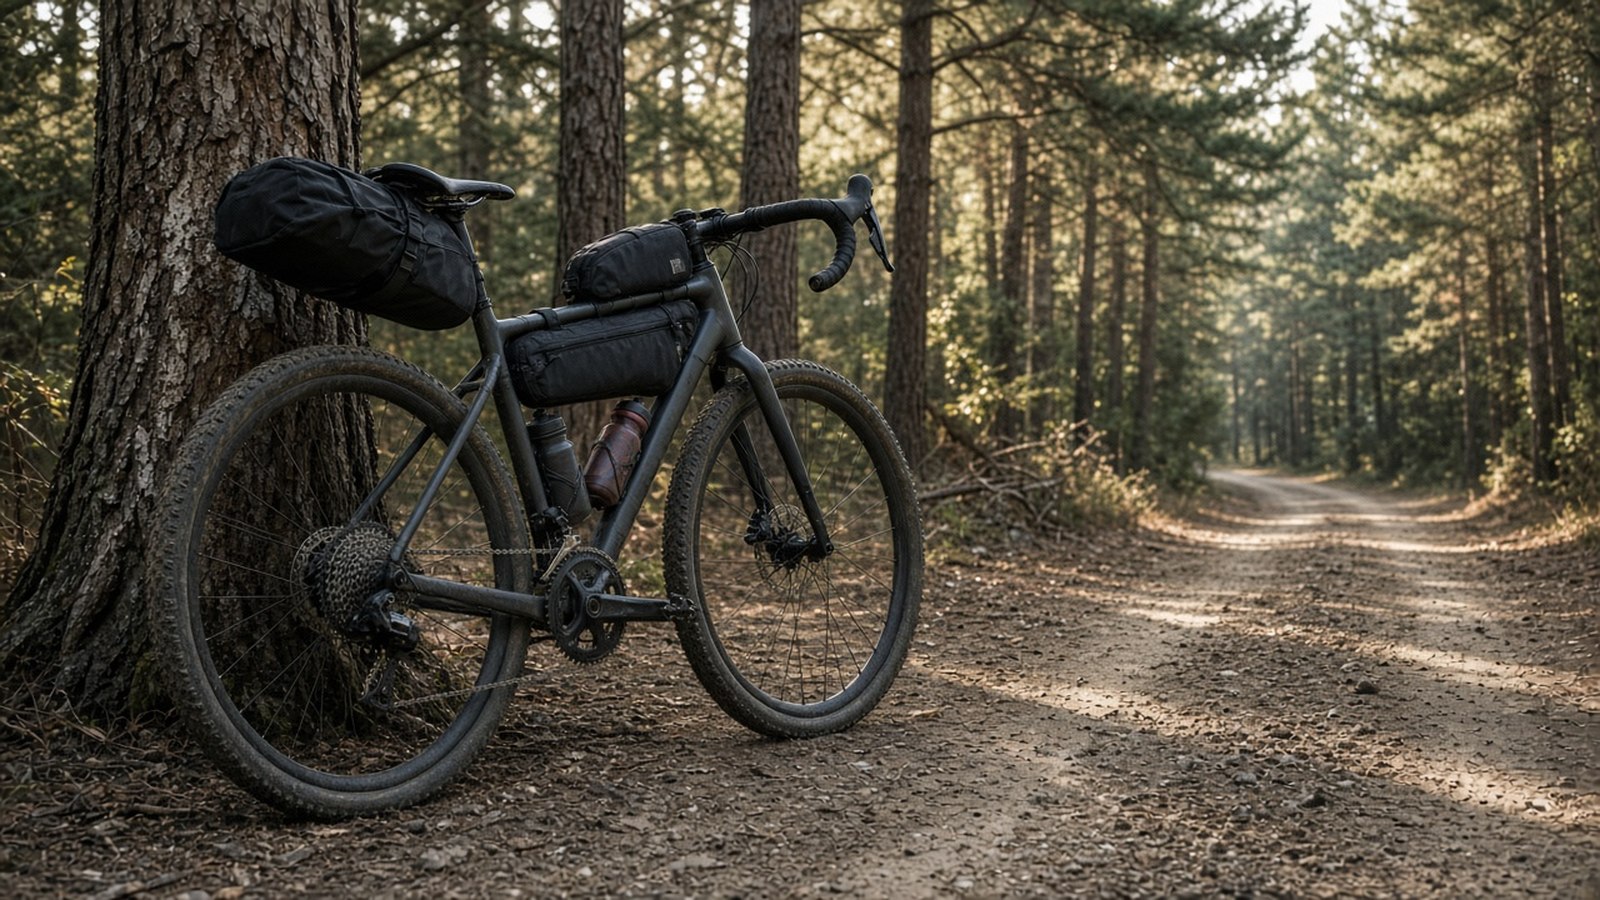
Put tools, water, and dense food in a frame bag low and centered on the bike. Put your sleep system in the seat pack. Put shelter and bulky insulation in a handlebar roll. Keep total weight modest and do a loaded shakedown ride before unfamiliar dirt.
Key takeaways
- Heavy, dense items go low and central in the frame bag.
- Light gear like a sleeping bag tolerates the seat pack's sway.
- Bulky-but-light shelter and insulation go in the handlebar roll.
- Always do a loaded shakedown ride before unfamiliar technical terrain.
Packing a gravel bike for a two-day dirt trip means fitting sleep, food, water, tools, and a layer system into a handful of frame-mounted bags without a rack or panniers — and doing it in a way that does not wreck the bike's handling on loose gravel or singletrack. The short answer: a frame bag for heavy, dense items low and centered, a seat pack for your sleep system, and a handlebar roll for bulky, light items, keeping total weight as low and close to the bike's center as possible.
Short version. Frame bag: tools, water, and dense food, because low and central is where weight belongs on a bike that will hit rough terrain. Seat pack: sleeping bag and sleep clothes, since it is lighter gear that tolerates the pack's natural sway. Handlebar roll: your shelter and any bulky insulation. Keep total kit weight modest — this is a two-day trip, not an expedition — and test-ride loaded before you commit to unfamiliar dirt. Pair with trail research and a pre-trip mechanical check. Check live prices.
Bikepacking bag systems exist specifically because racks and panniers add width and weight in the wrong places for rough terrain riding — a frame-mounted soft-bag system keeps the bike's profile narrow and its handling closer to unloaded, which matters far more on loose dirt and singletrack than it does on pavement.
Why weight placement matters more than total weight
A bike with even a modest amount of gear poorly placed — heavy items high on the handlebars, for instance — handles noticeably worse on loose or technical terrain than the same total weight distributed low and centered. Gravel and dirt riding punishes poor weight placement far more than smooth pavement does, because you need the bike to respond predictably when the front wheel deflects off a rock or the rear breaks loose in loose gravel on a climb.
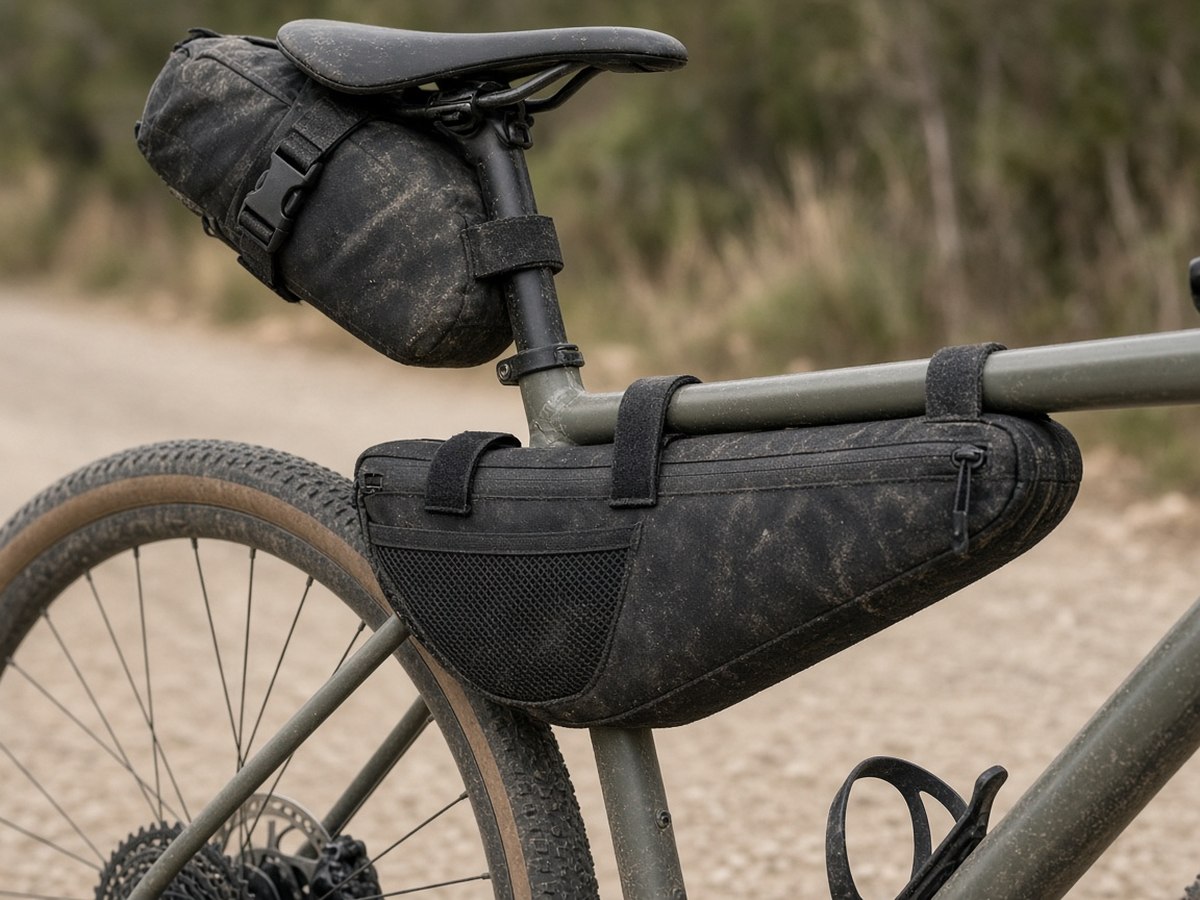
The general principle across bikepacking setups: heavy and dense items go in the frame bag, low and centered between the wheels. Lighter, bulkier items go in the seat pack and handlebar roll, where their higher position and rearward or forward placement matters less because they weigh less to begin with. Following this hierarchy consistently is worth more to your handling than any specific brand or bag choice.
The frame bag: tools, water, and dense food
A frame bag mounted inside the main triangle is the single most valuable piece of bikepacking storage for a two-day trip, because it occupies the lowest, most central position on the bike. Use it for your heaviest, densest items: a multi-tool, a spare tube and tire levers, a mini pump, and dense food like nut butter packets or bars that you will eat throughout the day without stopping to dig through a pack.
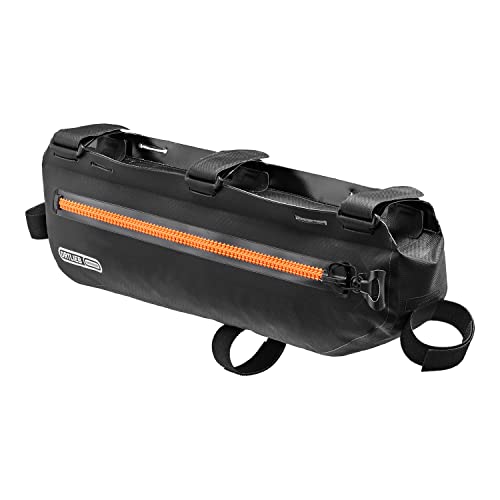
A full-frame bag that occupies the entire main triangle offers more capacity but eliminates the ability to carry a water bottle inside the frame — a partial or top-tube-style frame bag preserves at least one bottle cage while still providing meaningful low, central storage. For a two-day trip where water access along the route is uncertain, that trade-off is worth thinking through before you commit to a full-frame bag exclusively.
The seat pack: your sleep system
A seat pack mounted behind the saddle is the natural home for your sleeping bag or quilt and any dedicated sleep clothing, since this gear is relatively light and tolerates the slight side-to-side sway that a loaded seat pack exhibits on rough terrain far better than dense, heavy items would. Compress your sleep system as tightly as your gear allows — a loosely packed seat pack that sways excessively on technical terrain is both uncomfortable to ride behind and a real handling distraction on a fast descent.
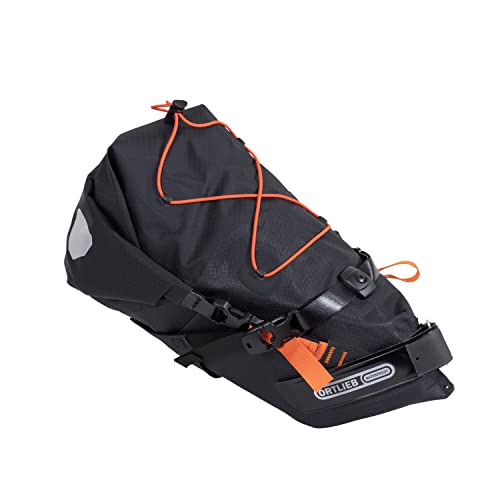
Waterproof seat packs matter more than most riders expect on a two-day dirt trip, since an unexpected rain shower or a stream crossing can soak an unprotected sleeping bag and ruin the second night of the trip entirely. A roll-top closure with a genuinely waterproof material, rather than just water-resistant fabric with a zipper, is worth the modest weight and cost difference for anything you cannot afford to get wet.
The handlebar roll: shelter and bulky insulation
A handlebar-mounted roll or harness system is the right home for your shelter — a tent, bivy, or tarp — and any bulky insulation layers you are not actively wearing. This position tolerates bulk well since it is forward of the steering axis and relatively easy to balance, though very heavy items here can make low-speed steering feel sluggish, so keep the actual weight in this position modest even though the volume can be generous.
Keep frequently accessed items, like a rain jacket you might need mid-ride without stopping to fully unpack, in a smaller accessory bag or the top of the handlebar roll rather than buried deep inside your shelter system. Digging through a fully packed handlebar roll on the side of a trail in a sudden rain shower is exactly the situation good packing organization is meant to prevent.
Water strategy for a route without guaranteed resupply
Two days of dirt riding, especially in warm weather or dry terrain, demands a real water plan rather than hoping for convenient stores along the route. Carry frame-mounted bottle cages for your primary supply, and consider a bladder in the frame bag or a dedicated water-specific bag if your route has long stretches without a reliable refill point. Research your specific route's water sources — streams, campgrounds, or towns — before you leave, rather than assuming you will find something along the way.
A compact water filter is worth the modest weight if your route includes natural water sources you plan to rely on, since carrying two full days of water from the start adds significant weight you would rather not haul over rough terrain the entire trip. Weigh the filter's weight against the water weight it saves you for your specific route length and water availability.
Test-ride loaded before committing to unfamiliar dirt
A fully loaded bike handles differently enough from an unloaded one that your first ride with a complete bikepacking setup should not be the technical singletrack section of an unfamiliar two-day route. Do at least one loaded shakedown ride on terrain similar to what you will encounter, checking that nothing shifts, rubs on the tire, or throws off your balance on a climb or a loose corner.
Use the shakedown ride to check your bag mounting points for rub marks or wear on the frame's paint or carbon layup — bikepacking bags that are not properly padded or positioned can wear through a frame's finish over a multi-day trip of vibration on rough roads. A strip of protective tape at contact points is cheap insurance against a cosmetic or, in the case of carbon frames, potentially structural issue.
Navigation and route planning for two days off the grid
Cell coverage on dirt routes, especially in mountain or remote terrain, is frequently unreliable, so plan navigation that does not depend entirely on a live data connection. Download offline maps for your specific route before you leave, and carry a physical backup like a printed cue sheet or a paper map for the sections where you cannot afford to be wrong about a junction.
Tell someone your planned route and expected return time before you leave, the same float-plan discipline that applies to any remote outdoor trip. A two-day dirt route with limited cell service is exactly the kind of trip where a missed check-in should trigger someone looking for you, and that only works if someone actually knows your plan in the first place, down to the specific trailhead and the day you expect to be back on pavement.
Clothing and layers for changing terrain and weather
A two-day dirt route often crosses varied elevation and exposure, meaning the layer system that felt right at the trailhead can be wrong by the afternoon climb or the evening descent. Pack a lightweight, packable rain shell regardless of the forecast, since mountain and dirt-road weather changes faster than most forecasts predict, and getting soaked without a shell on a cool evening is a fast route to a miserable, cold camp.
Tires and tubeless setup for two days of dirt
Tire choice matters more for a two-day dirt trip than for a day ride, since a flat far from resupply is a genuinely bigger problem than one close to home. Run a tubeless setup with fresh sealant if your wheels and tires support it — tubeless dramatically reduces pinch flats and small-puncture failures on rough terrain compared to tubed tires, and it is worth the setup effort before a multi-day trip rather than after a preventable flat on day one.
Carry at least one spare tube even with a tubeless setup, since a sidewall cut or a puncture too large for sealant to seal can still leave you needing a tube to finish the ride. A tubeless plug kit, small and light enough to live in a top-tube bag, handles most punctures on the trail without needing to remove the wheel at all, which is a meaningful time and hassle savings on a route with a schedule to keep.
Cooking and food strategy for the trail
Decide before you pack whether you are cooking hot meals or eating cold, no-cook food for the trip, since that decision drives a meaningful amount of your gear list. A lightweight canister stove and a single pot adds real weight and bulk for boiling water for dehydrated meals or coffee, but many riders find the morale value of a hot meal after a long day worth the extra grams, especially on a cold-weather trip.
If you go stoveless, focus on food that tastes good cold and provides real calories without cooking — tortillas with nut butter, cured meats, hard cheese, and energy bars all travel well and require no preparation time at camp. Whichever approach you choose, pack slightly more calories than you think you need; underestimating food needs on a physically demanding two-day dirt ride is a common mistake that turns the second day miserable.
| Bag | What goes here | Why |
|---|---|---|
| Frame bag (main triangle) | Tools, water, dense food | Lowest, most central position on the bike |
| Seat pack | Sleeping bag, sleep clothes | Light gear tolerates natural sway well |
| Handlebar roll | Shelter, bulky insulation | Tolerates volume, keep actual weight modest |
| Accessory/top-tube bag | Snacks, phone, quick-access rain layer | Reachable without stopping or unpacking |
Our take: heavy and dense low and central in the frame bag, light gear in the seat pack, bulky-but-light gear up front in the handlebar roll, and a real shakedown ride before committing to unfamiliar dirt. That order is what keeps a loaded gravel bike handling like a gravel bike instead of a loaded pack mule. Check live prices.
Frequently asked questions
What goes in a bikepacking frame bag?
Your heaviest, densest items: tools, a spare tube, a pump, and dense food. The frame bag sits in the lowest, most central position on the bike, which is where weight belongs.
What goes in a bikepacking seat pack?
Your sleeping bag and sleep clothes. This lighter gear tolerates the natural side-to-side sway a loaded seat pack exhibits on rough terrain better than heavy items would.
Should I test-ride a loaded gravel bike before a trip?
Yes. A fully loaded bike handles differently from an unloaded one. Do a shakedown ride on similar terrain before committing to unfamiliar technical dirt or singletrack.
How much water should I carry on a two-day gravel trip?
Enough for the longest realistic gap between refill points on your specific route. Research water sources in advance, and consider a compact filter if natural water sources are available along the way.
Do bikepacking bags damage a bike frame?
They can cause rub wear if not properly positioned or padded. Check contact points on a shakedown ride and add protective tape where bags rub against the frame.
Do I need a rack for a two-day gravel bikepacking trip?
No. Frame-mounted soft bags keep the bike's profile narrow and handling closer to unloaded, which matters more on rough terrain than the extra capacity a rack and panniers provide.